Saturday 17 August 2013

Increase traffic

Reduce Load Time 

Hi friends we know that all blogger people want to increase their traffic so i tell you some tips.

# Low social networks icons

I tell you how to increase your traffic on blogs. So firstly keep in mind that only add some social icons. It means we add only our famous page like as Facebook,Twitter etc. 

If you have add more icons then when visitor's are click the page and it take to many seconds for loading all content and also update social networks. So reduce the icons. If you have more load time of blogs then visitor's will not come to here in future and not impress to your blogs.

# Main Content show on home page

 Content are play main role for every blogger blogs. So we show only our famous blogs on home page because page have took more time to update and it is not good for any blogs so visitor's are not like this. So to take action for your blogs.

# Remove Java script

If you have more use of Java script then it is cause of late page load. So you have used only require java script only in your template. And use more attractive template is come more visitor's for your blogs. 

Thursday 15 August 2013

HTML Images


Norwegian Mountain Trip

Pulpit Rock


HTML Images - The <img> Tag and the Src Attribute

In HTML, images are defined with the <img> tag. 
The <img> tag is empty, which means that it contains attributes only, and has no closing tag.
To display an image on a page, you need to use the src attribute. Src stands for "source". The value of the src attribute is the URL of the image you want to display.
Syntax for defining an image:
<img src="url" alt="some_text">
The URL points to the location where the image is stored. An image named "boat.gif", located in the "images" directory on "www.w3schools.com" has the URL: http://www.w3schools.com/images/boat.gif.
The browser displays the image where the <img> tag occurs in the document. If you put an image tag between two paragraphs, the browser shows the first paragraph, then the image, and then the second paragraph.

HTML Images - The Alt Attribute

The required alt attribute specifies an alternate text for an image, if the image cannot be displayed.
The value of the alt attribute is an author-defined text:
<img src="boat.gif" alt="Big Boat">
The alt attribute provides alternative information for an image if a user for some reason cannot view it (because of slow connection, an error in the src attribute, or if the user uses a screen reader).

HTML Images - Set Height and Width of an Image

The height and width attributes are used to specify the height and width of an image.
The attribute values are specified in pixels by default:
<img src="pulpit.jpg" alt="Pulpit rock" width="304" height="228">
Tip: It is a good practice to specify both the height and width attributes for an image. If these attributes are set, the space required for the image is reserved when the page is loaded. However, without these attributes, the browser does not know the size of the image. The effect will be that the page layout will change during loading (while the images load).

Basic Notes - Useful Tips

Note: If an HTML file contains ten images - eleven files are required to display the page right. Loading images takes time, so my best advice is: Use images carefully.
Note: When a web page is loaded, it is the browser, at that moment, that actually gets the image from a web server and inserts it into the page. Therefore, make sure that the images actually stay in the same spot in relation to the web page, otherwise your visitors will get a broken link icon. The broken link icon is shown if the browser cannot find the image.


HTML Image Tags

Tag Description
<img> Defines an image
<map> Defines an image-map
<area> Defines a clickable area inside an image-map

HTML CSS

CSS (Cascading Style Sheets) is used to style HTML elements.

Look! Styles and colors

Manipulate Text
Colors,  Boxes

Styling HTML with CSS

CSS was introduced together with HTML 4, to provide a better way to style HTML elements.
CSS can be added to HTML in the following ways:
  • Inline - using the style attribute in HTML elements
  • Internal - using the <style> element in the <head> section
  • External - using an external CSS file
The preferred way to add CSS to HTML, is to put CSS syntax in separate CSS files.
However, in this HTML tutorial we will introduce you to CSS using the style attribute. This is done to simplify the examples. It also makes it easier for you to edit the code and try it yourself.
You can learn everything about CSS in our CSS Tutorial.

Inline Styles

An inline style can be used if a unique style is to be applied to one single occurrence of an element.
To use inline styles, use the style attribute in the relevant tag. The style attribute can contain any CSS property. The example below shows how to change the text color and the left margin of a paragraph:
<p style="color:blue;margin-left:20px;">This is a paragraph.</p>
To learn more about style sheets, visit our CSS tutorial.

HTML Style Example - Background Color

The background-color property defines the background color for an element:

Example

<!DOCTYPE html>
<html>

<body style="background-color:yellow;">
<h2 style="background-color:red;">This is a heading</h2>
<p style="background-color:green;">This is a paragraph.</p>
</body>

</html>
The background-color property makes the "old" bgcolor attribute obsolete.

HTML Style Example - Font, Color and Size

The font-family, color, and font-size properties defines the font, color, and size of the text in an element:

Example

<!DOCTYPE html>
<html>

<body>
<h1 style="font-family:verdana;">A heading</h1>
<p style="font-family:arial;color:red;font-size:20px;">A paragraph.</p>
</body>

</html>
The font-family, color, and font-size properties make the old <font> tag obsolete.

HTML Style Example - Text Alignment

The text-align property specifies the horizontal alignment of text in an element:

Example

<!DOCTYPE html>
<html>

<body>
<h1 style="text-align:center;">Center-aligned heading</h1>
<p>This is a paragraph.</p>
</body>

</html>
The text-align property makes the old <center> tag obsolete.


Internal Style Sheet

An internal style sheet can be used if one single document has a unique style. Internal styles are defined in the <head> section of an HTML page, by using the <style> tag, like this:
<head>
<style type="text/css">
body {background-color:yellow;}
p {color:blue;}
</style>
</head>


External Style Sheet

An external style sheet is ideal when the style is applied to many pages. With an external style sheet, you can change the look of an entire Web site by changing one file. Each page must link to the style sheet using the <link> tag. The <link> tag goes inside the <head> section:
<head>
<link rel="stylesheet" type="text/css" href="mystyle.css">
</head>


HTML Style Tags

Tag Description
<style> Defines style information for a document
<link> Defines the relationship between a document and an external resource


Deprecated Tags and Attributes

In HTML 4, several tags and attributes were used to style documents. These tags are not supported in newer versions of HTML.
Avoid using the elements: <font>, <center>, and <strike>, and the attributes: color and bgcolor.

HTML head Elements

The HTML <head> Element

The <head> element is a container for all the head elements. Elements inside <head> can include scripts, instruct the browser where to find style sheets, provide meta information, and more.
The following tags can be added to the head section: <title>, <style>, <meta>, <link>, <script>, <noscript>, and <base>.

The HTML <title> Element

The <title> tag defines the title of the document.
The <title> element is required in all HTML/XHTML documents.
The <title> element:
  • defines a title in the browser toolbar
  • provides a title for the page when it is added to favorites
  • displays a title for the page in search-engine results
A simplified HTML document:
<!DOCTYPE html>
<html>
<head>
<title>Title of the document</title>
</head>

<body>
The content of the document......
</body>

</html>


The HTML <base> Element

The <base> tag specifies the base URL/target for all relative URLs in a page:
<head>
<base href="http://www.Google.com/images/" target="_blank">
</head>


The HTML <link> Element

The <link> tag defines the relationship between a document and an external resource.
The <link> tag is most used to link to style sheets:
<head>
<link rel="stylesheet" type="text/css" href="mystyle.css">
</head>


The HTML <style> Element

The <style> tag is used to define style information for an HTML document.
Inside the <style> element you specify how HTML elements should render in a browser:
<head>
<style type="text/css">
body {background-color:yellow}
p {color:blue}
</style>
</head>


The HTML <meta> Element

Metadata is data (information) about data.
The <meta> tag provides metadata about the HTML document. Metadata will not be displayed on the page, but will be machine parsable.
Meta elements are typically used to specify page description, keywords, author of the document, last modified, and other metadata.
The metadata can be used by browsers (how to display content or reload page), search engines (keywords), or other web services.
<meta> tags always go inside the <head> element.

<meta> Tags - Examples of Use

Define keywords for search engines:
<meta name="keywords" content="HTML, CSS, XML, XHTML, JavaScript">
Define a description of your web page:
<meta name="description" content="Free Web tutorials on HTML and CSS">
Define the author of a page:
<meta name="author" content="Hege Refsnes">
Refresh document every 30 seconds:
<meta http-equiv="refresh" content="30">


The HTML <script> Element

The <script> tag is used to define a client-side script, such as a JavaScript.
The <script> element will be explained in a later chapter.

HTML head Elements

Tag Description
<head> Defines information about the document
<title> Defines the title of a document
<base> Defines a default address or a default target for all links on a page
<link> Defines the relationship between a document and an external resource
<meta> Defines metadata about an HTML document
<script> Defines a client-side script
<style> Defines style information for a document

HTML Links

HTML Hyperlinks (Links)

The HTML <a> tag defines a hyperlink.
A hyperlink (or link) is a word, group of words, or image that you can click on to jump to another document.
When you move the cursor over a link in a Web page, the arrow will turn into a little hand.
The most important attribute of the <a> element is the href attribute, which indicates the link’s destination.
By default, links will appear as follows in all browsers:
  • An unvisited link is underlined and blue
  • A visited link is underlined and purple
  • An active link is underlined and red

HTML Link Syntax

The HTML code for a link is simple. It looks like this:
<a href="url">Link text</a>
The href attribute specifies the destination of a link.

Example

<a href="http://www.Google.com/">Visit Google</a>

Clicking on this hyperlink will send the user to Google' homepage.
Tip: The "Link text" doesn't have to be text. It can be an image or any other HTML element.

HTML Links - The target Attribute

The target attribute specifies where to open the linked document.
The example below will open the linked document in a new browser window or a new tab:

Example

<a href="http://www.Google.com">Visit Google!</a>


HTML Links - The id Attribute

The id attribute can be used to create a bookmark inside an HTML document.
Tip: Bookmarks are not displayed in any special way. They are invisible to the reader.

Example

An anchor with an id inside an HTML document:
<a id="tips">Useful Tips Section</a>
Create a link to the "Useful Tips Section" inside the same document:
<a href="#tips">Visit the Useful Tips Section</a>
Or, create a link to the "Useful Tips Section" from another page:
<a href="http://www.w3schools.com/html_links.htm#tips">
Visit the Useful Tips Section</a>


HTML Link Tags

TagDescription
<a>Defines a hyperlink

HTML Formatting

HTML Text Formatting

This text is bold

This text is italic

This is computer output

This is subscript and superscript


HTML Formatting Tags

HTML uses tags like <b> and <i> for formatting output, like bold or italic text.
These HTML tags are called formatting tags (look at the bottom of this page for a complete reference).
Often <strong> renders as <b>, and <em> renders as <i>.

However, there is a difference in the meaning of these tags:

<b> or <i> defines bold or italic text only.

<strong> or <em> means that you want the text to be rendered in a way that the user understands as "important". Today, all major browsers render strong as bold and em as italics. However, if a browser one day wants to make a text highlighted with the strong feature, it might be cursive for example and not bold!

HTML Text Formatting Tags

Tag Description
<b> Defines bold text
<em> Defines emphasized text 
<i> Defines a part of text in an alternate voice or mood
<small> Defines smaller text
<strong> Defines important text
<sub> Defines subscripted text
<sup> Defines superscripted text
<ins> Defines inserted text
<del> Defines deleted text
<mark> Defines marked/highlighted text

HTML "Computer Output" Tags

Tag Description
<code> Defines computer code text
<kbd> Defines keyboard text 
<samp> Defines sample computer code
<var> Defines a variable
<pre> Defines preformatted text

HTML Citations, Quotations, and Definition Tags

Tag Description
<abbr> Defines an abbreviation or acronym
<address> Defines contact information for the author/owner of a document
<bdo> Defines the text direction
<blockquote> Defines a section that is quoted from another source
<q> Defines an inline (short) quotation
<cite> Defines the title of a work
<dfn> Defines a definition term
  

HTML Paragraphs

HTML documents are divided into paragraphs.

HTML Paragraphs

Paragraphs are defined with the <p> tag.

Example

<p>This is a paragraph</p>
<p>This is another paragraph</p>


Note: Browsers automatically add an empty line before and after a paragraph.

Don't Forget the End Tag

Most browsers will display HTML correctly even if you forget the end tag:

Example

<p>This is a paragraph
<p>This is another paragraph


The example above will work in most browsers, but don't rely on it. Forgetting the end tag can produce unexpected results or errors.
Note: Future version of HTML will not allow you to skip end tags.

HTML Line Breaks

Use the <br> tag if you want a line break (a new line) without starting a new paragraph:

Example

<p>This is<br>a para<br>graph with line breaks</p>


The <br> element is an empty HTML element. It has no end tag.

HTML Output - Useful Tips

You cannot be sure how HTML will be displayed. Large or small screens, and resized windows will create different results.
With HTML, you cannot change the output by adding extra spaces or extra lines in your HTML code.
The browser will remove extra spaces and extra lines when the page is displayed. Any number of lines count as one line, and any number of spaces count as one space.

HTML Tag Reference

tutorials4begginers tag reference contains additional information about HTML elements and their attributes.
Tag Description
<p> Defines a paragraph
<br> Inserts a single line break

HTML Headings

Headings are important in HTML documents.

HTML Headings

Headings are defined with the <h1> to <h6> tags.
<h1> defines the most important heading. <h6> defines the least important heading.

Example

<h1>This is a heading</h1>
<h2>This is a heading</h2>
<h3>This is a heading</h3>


Note: Browsers automatically add some empty space (a margin) before and after each heading.

Headings Are Important

Use HTML headings for headings only. Don't use headings to make text BIG or bold.
Search engines use your headings to index the structure and content of your web pages.
Since users may skim your pages by its headings, it is important to use headings to show the document structure.
H1 headings should be used as main headings, followed by H2 headings, then the less important H3 headings, and so on.

HTML Lines

The <hr>tag creates a horizontal line in an HTML page.

The hr element can be used to separate content:

Example

<p>This is a paragraph.</p>
<hr>
<p>This is a paragraph.</p>
<hr>
<p>This is a paragraph.</p>


HTML Comments

Comments can be inserted into the HTML code to make it more readable and understandable. Comments are ignored by the browser and are not displayed.
Comments are written like this:

Example

<!-- This is a comment -->


Note: There is an exclamation point after the opening bracket, but not before the closing bracket.

HTML Tag Reference

http://Tutorials4Begginers.blogspot.in  tag reference contains additional information about these tags and their attributes.
You will learn more about HTML tags and attributes in the next chapters of this tutorial.
Tag Description
<html> Defines an HTML document
<body> Defines the document's body
<h1> to <h6> Defines HTML headings
<hr> Defines a horizontal line
<!--> Defines a comment

HTML Attributes

Attributes provide additional information about HTML elements.

HTML Attributes

  • HTML elements can have attributes
  • Attributes provide additional information about an element
  • Attributes are always specified in the start tag
  • Attributes come in name/value pairs like: name="value"

Attribute Example

HTML links are defined with the <a> tag. The link address is specified in the href attribute:

Example

<a href="http://www.google.com">This is a link</a>


Always Quote Attribute Values

Attribute values should always be enclosed in quotes.
Double style quotes are the most common, but single style quotes are also allowed.
RemarkTip: In some rare situations, when the attribute value itself contains quotes, it is necessary to use single quotes: name='John "ShotGun" Nelson'

HTML Tip: Use Lowercase Attributes

Attribute names and attribute values are case-insensitive.
However, the World Wide Web Consortium (W3C) recommends lowercase attributes/attribute values in their HTML 4 recommendation.
Newer versions of (X)HTML will demand lowercase attributes.

HTML Attributes Reference

A complete list of legal attributes for each HTML element is listed in our: HTML Tag Reference.
Below is a list of some attributes that can be used on any HTML element:
Attribute Description
class Specifies one or more classnames for an element (refers to a class in a style sheet)
id Specifies a unique id for an element
style Specifies an inline CSS style for an element
title Specifies extra information about an element (displayed as a tool tip)

HTML Elements

HTML documents are defined by HTML elements.

HTML Elements

An HTML element is everything from the start tag to the end tag:
Start tag * Element content End tag *
<p> This is a paragraph </p>
<a href="default.htm"> This is a link </a>
<br>    
* The start tag is often called the opening tag. The end tag is often called the closing tag.

HTML Element Syntax

  • An HTML element starts with a start tag / opening tag
  • An HTML element ends with an end tag / closing tag
  • The element content is everything between the start and the end tag
  • Some HTML elements have empty content
  • Empty elements are closed in the start tag
  • Most HTML elements can have attributes
Tip: You will learn about attributes in the next chapter of this tutorial.

Nested HTML Elements

Most HTML elements can be nested (can contain other HTML elements).
HTML documents consist of nested HTML elements.

HTML Document Example

<!DOCTYPE html>
<html>

<body>
<p>This is my first paragraph.</p>
</body>

</html>
The example above contains 3 HTML elements.

HTML Example Explained

The <p> element:
<p>This is my first paragraph.</p>
The <p> element defines a paragraph in the HTML document.
The element has a start tag <p> and an end tag </p>.
The element content is: This is my first paragraph.
The <body> element:
<body>
<p>This is my first paragraph.</p>
</body>
The <body> element defines the body of the HTML document.
The element has a start tag <body> and an end tag </body>.
The element content is another HTML element (a p element).
The <html> element:
<html>

<body>
<p>This is my first paragraph.</p>
</body>

</html>
The <html> element defines the whole HTML document.
The element has a start tag <html> and an end tag </html>.
The element content is another HTML element (the body element).

Don't Forget the End Tag

Some HTML elements might display correctly even if you forget the end tag:
<p>This is a paragraph
The example above works in most browsers, because the closing tag is considered optional.
Never rely on this. Many HTML elements will produce unexpected results and/or errors if you forget the end tag .

Empty HTML Elements

HTML elements with no content are called empty elements.
<br> is an empty element without a closing tag (the <br> tag defines a line break).
Tip: In XHTML, all elements must be closed. Adding a slash inside the start tag, like <br />, is the proper way of closing empty elements in XHTML (and XML).

HTML Tip: Use Lowercase Tags

HTML tags are not case sensitive: <P> means the same as <p>. Many web sites use uppercase HTML tags.
W3Schools use lowercase tags because the World Wide Web Consortium (W3C) recommends lowercase in HTML 4, and demands lowercase tags in XHTML.

HTML Basic


HTML Headings

HTML headings are defined with the <h1> to <h6> tags.

Example

<h1>This is a heading</h1>
<h2>This is a heading</h2>
<h3>This is a heading</h3>


HTML Paragraphs

HTML paragraphs are defined with the <p> tag.

Example

<p>This is a paragraph.</p>
<p>This is another paragraph.</p>


HTML Links

HTML links are defined with the <a> tag.

Example

<a href="http://tutorials4begginers.blogspot.in">This is a link</a>

Note: The link address is specified in the href attribute.
(You will learn about attributes in a later chapter of this tutorial).

HTML Images

HTML images are defined with the <img> tag.

Example

<img src="blog.jpg" width="104" height="142"> 

Note: The filename and the size of the image are provided as attributes.

HTML Editors

Writing HTML Using Notepad or TextEdit

HTML can be edited by using a professional HTML editor like:
  • Adobe Dreamweaver
  • Microsoft Expression Web
  • CoffeeCup HTML Editor
However, for learning HTML we recommend a text editor like Notepad (PC) or TextEdit (Mac). We believe using a simple text editor is a good way to learn HTML.
Follow the 4 steps below to create your first web page with Notepad.

Step 1: Start Notepad

To start Notepad go to:
Start
    All Programs
        Accessories
            Notepad


Step 2: Edit Your HTML with Notepad

Type your HTML code into your Notepad:
Notepad

Step 3: Save Your HTML

Select Save as.. in Notepad's file menu.
When you save an HTML file, you can use either the .htm or the .html file extension. There is no difference, it is entirely up to you.
Save the file in a folder that is easy to remember, like w3schools.

Step 4: Run the HTML in Your Browser

Start your web browser and open your html file from the File, Open menu, or just browse the folder and double-click your HTML file.
The result should look much like this:
View in Browser

HTML Introduction


What is HTML?

HTML is a language for describing web pages.
  • HTML stands for Hyper Text Markup Language
  • HTML is a markup language
  • A markup language is a set of markup tags
  • The tags describe document content
  • HTML documents contain HTML tags and plain text
  • HTML documents are also called web pages

HTML Tags

HTML markup tags are usually called HTML tags
  • HTML tags are keywords (tag names) surrounded by angle brackets like <html>
  • HTML tags normally come in pairs like <b> and </b>
  • The first tag in a pair is the start tag, the second tag is the end tag
  • The end tag is written like the start tag, with a forward slash before the tag name
  • Start and end tags are also called opening tags and closing tags
<tagname>content</tagname>


HTML Elements

"HTML tags" and "HTML elements" are often used to describe the same thing.
But strictly speaking, an HTML element is everything between the start tag and the end tag, including the tags:
HTML Element:
<p>This is a paragraph.</p>


Web Browsers

The purpose of a web browser (such as Google Chrome, Internet Explorer, Firefox, Safari) is to read HTML documents and display them as web pages.
The browser does not display the HTML tags, but uses the tags to determine how the content of the HTML page is to be presented/displayed to the user:
Browser

HTML Page Structure

Below is a visualization of an HTML page structure:
<html>
<body>
<h1>This a heading</h1>
<p>This is a paragraph.</p>
<p>This is another paragraph.</p>
</body>
</html>


HTML Versions

Since the early days of the web, there have been many versions of HTML:
Version Year
HTML 1991
HTML+ 1993
HTML 2.0 1995
HTML 3.2 1997
HTML 4.01 1999
XHTML 1.0 2000
HTML5 2012
XHTML5 2013


The <!DOCTYPE> Declaration

The <!DOCTYPE> declaration helps the browser to display a web page correctly.
There are many different documents on the web, and a browser can only display an HTML page 100% correctly if it knows the HTML type and version used.

Common Declarations

HTML5

<!DOCTYPE html>

HTML 4.01

<!DOCTYPE HTML PUBLIC "-//W3C//DTD HTML 4.01 Transitional//EN"
"http://www.w3.org/TR/html4/loose.dtd">

XHTML 1.0

<!DOCTYPE html PUBLIC "-//W3C//DTD XHTML 1.0 Transitional//EN"
"http://www.w3.org/TR/xhtml1/DTD/xhtml1-transitional.dtd">

SQL SERVER

1) General Questions on SQL SERVER


What is RDBMS?


Relational Data Base Management Systems (RDBMS) are database management systems that maintain data records and indices in tables. Relationships may be created and maintained across and among the data and tables. In a relational database, relationships between data items are expressed by means of tables. Interdependencies among these tables are expressed by data values rather than by pointers. This allows a high degree of data independence. An RDBMS has the capability to recombine the data items from different files, providing powerful tools for data usage. (Read more here)
What are the Properties of the Relational Tables?

Relational tables have the following six properties:

    Values are atomic.
    Column values are of the same kind.
    Each row is unique.
    The sequence of columns is insignificant.
    The sequence of rows is insignificant.
    Each column must have a unique name.

What is Normalization?


Database normalization is a data design and organization process applied to data structures based on rules that help building relational databases. In relational database design, the process of organizing data to minimize redundancy is called normalization. Normalization usually involves dividing a database into two or more tables and defining relationships between the tables. The objective is to isolate data so that additions, deletions, and modifications of a field can be made in just one table and then propagated through the rest of the database via the defined relationships.
What is De-normalization?

De-normalization is the process of attempting to optimize the performance of a database by adding redundant data. It is sometimes necessary because current DBMSs implement the relational model poorly. A true relational DBMS would allow for a fully normalized database at the logical level, while providing physical storage of data that is tuned for high performance. De-normalization is a technique to move from higher to lower normal forms of database modeling in order to speed up database access.
How is ACID property related to Database?

ACID (an acronym for Atomicity Consistency Isolation Durability) is a concept that Database Professionals generally look for while evaluating databases and application architectures. For a reliable database, all this four attributes should be achieved.

Atomicity is an all-or-none proposition.

Consistency guarantees that a transaction never leaves your database in a half-finished state.

Isolation keeps transactions separated from each other until they are finished.

Durability guarantees that the database will keep track of pending changes in such a way that the server can recover from an abnormal termination. (Read more here)
What are the Different Normalization Forms?

1NF: Eliminate Repeating Groups

Make a separate table for each set of related attributes, and give each table a primary key. Each field contains at most one value from its attribute domain.

2NF: Eliminate Redundant Data

If an attribute depends on only part of a multi-valued key, then remove it to a separate table.

3NF: Eliminate Columns Not Dependent On Key

If attributes do not contribute to a description of the key, then remove them to a separate table. All attributes must be directly dependent on the primary key. (Read more here)

BCNF: Boyce-Codd Normal Form

If there are non-trivial dependencies between candidate key attributes, then separate them out into distinct tables.

4NF: Isolate Independent Multiple Relationships

No table may contain two or more 1:n or n:m relationships that are not directly related.

5NF: Isolate Semantically Related Multiple Relationships

There may be practical constrains on information that justify separating logically related many-to-many relationships.

ONF: Optimal Normal Form

A model limited to only simple (elemental) facts, as expressed in Object Role Model notation.

DKNF: Domain-Key Normal Form

A model free from all modification anomalies is said to be in DKNF.

Remember, these normalization guidelines are cumulative. For a database to be in 3NF, it must first fulfill all the criteria of a 2NF and 1NF database.

HTML for Begginers


HTML for Beginners Required HTML Tags

Now that we've covered the rules of HTML <ss01.html>, we're ready to start coding. To illustrate just what HTML code does, we're going to build a simple page for the fictitious company E-Z Accounting. Click "See it in action" to keep track of the E-Z Accounting site's progress.
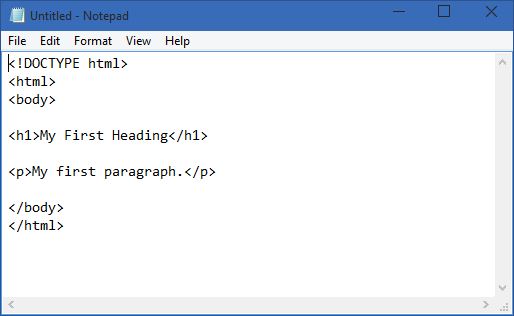
There are certain tags you need to put in every HTML document to set it up as a Web page. Begin by opening a new document in your text editor.
<HTML> is the first tag to appear on every Web page. Add the opening and closing tags to your page like this:
<HTML>
</HTML>
All of the page's code will be placed between these two tags, which tell a Web browser it's reading an HTML document.
Below the opening <HTML> tag, enter the <HEAD> tag, which contains information about the document but doesn't appear on the Web page. Your document should now look like this:
<HTML>
<HEAD>
</HEAD>
</HTML>
There are several tags that can go between <HEAD> tags--for example, you'll regularly come across <META> </Authoring/Metadata/> tags that help search engines categorize pages--but the only tag that's required is the <TITLE> tag, which puts text in the browser's title bar. Your document should now resemble the example below (remember: First on, last off):
<HTML>
<HEAD>
<TITLE>E-Z Accounting
</TITLE>
</HEAD>
</HTML>
Now you're ready to add opening and closing <BODY> tags. Your document should now look like this:
<HTML>
<HEAD>
<TITLE>E-Z Accounting
</TITLE>
</HEAD>
<BODY>
</BODY>
</HTML>
Everything that appears inside the Web page will go between the <BODY> tags.
See it in action <javascript:openWindow('ss02x.html','Win',true,600,650)>
Our page doesn't look like much so far, does it? All you see is the name "E-Z Accounting" in the browser's title bar above a blank page. Don't worry; we're just getting started. Save your file in text format with the filename index.html (or index.htm if you're still using Windows 3.1), and we'll start to make things more interesting.
 
HTML for Beginners Setting Background and Text Color
 
The <BODY> tag uses several important attributes to control the look of your page. Use the BGCOLOR attribute and value to change your page's background color. Version 3.x and later browsers can read some colors from a list of standard English words < http://utopia.knoware.nl/users/schluter/doc/tags/colornames.html>, such as white, blue, black, and the like. But to take advantage of all Web-safe colors, you'll need to use hexadecimal color codes. VisiBone's <http://www.visibone.com/colorlab/> Webmaster's Color Lab displays safe colors with their hex codes, allowing you to view colors in different combinations and side by side. By selecting several colors at once, you can quickly create an entire color scheme for your site.
Keep in mind that most browsers can display colors from a palette of only 256 different hues and shades. If you use a color that's not in the palette, the browser will try to choose a similar one. If you want to guarantee that your colors will appear as close to your original choices as possible, select colors from Netscape's 216 browser-safe colors </Graphics/Design/ss3dlink.html?tag=st.bl.f062700.txt.bl_ss3dlink> (a simplified subset of the Mac's and PC's 256-color palettes.
For our sample page, let's keep things simple and use a plain white background. The hexadecimal code for white is #FFFFFF, so we'll add an attribute to the existing <BODY> tag so that it reads:
<BODY BGCOLOR="#FFFFFF">
See it in action <javascript:openWindow('ss03x.html','Win',true,600,650)>
Background Images
You can also use an image as your background. Any image you choose will tile into the background--that is, it will go into the background without changing size and then reproduce itself over and over to fill the page. Never use a background that makes text difficult to read. To tile an image, add the BACKGROUND attribute to the BODY tag (bgimage.gif is a sample background image):
<BODY BACKGROUND="bgimage.gif">
See it in action <javascript:openWindow('ss03xx.html','Win',true,600,650)>
In the end, the E-Z Accounting team decided to stick with a simple white background to keep the design uncluttered, make the text easy to read, and ensure that the links stand out.
Text Colors
You can apply hex or name values to attributes of the <BODY> tag to designate the color of your page's regular text and linked text. The TEXT attribute sets the color of the regular text. The LINK attribute controls the color of linked text. VLINK designates the color of a followed link; it's helpful when you're presenting a list of links because it lets your users distinguish the pages they've already visited. Finally, ALINK designates the color that links become when clicked. ALINK is usually the same value as VLINK. For our page, we're going to have black (#000000) text and bright blue links (#33FFFF) that turn dark purple (#330066) when clicked and followed:
<BODY BGCOLOR="#FFFFFF" TEXT="#000000" LINK="#33FFFF" VLINK="#330066" ALINK="#330066">
You'll see just how this color scheme looks in the next two lessons, when we add text and links.

Adding Text

It's time to say something on our page. You've already set the basic colors of your text using the attributes of the <BODY> tag, but now you can start adding the words that will appear in your page. We'll start with a headline. Let's say the company's motto is, "E-Z Accounting: Tax Services That Aren't Too Taxing." Go ahead and add it to the page beneath the <BODY> tag:
<BODY BGCOLOR="#FFFFFF" TEXT="#000000" LINK="#33FFFF" VLINK="#330066" ALINK="#330066">
E-Z Accounting: Tax Services That Aren't Too Taxing
</BODY>
See it in action <javascript:openWindow('ss04x.html','Win',true,600,650)>
Kind of dull, eh? It's just plain text with nothing to call attention to it. You could use specific tags to make it bold or italic and bump the size up, but what you really want are header tags, which do all that for you. Header tags range from <H1> to <H6>, with <H1> the largest and <H6> the smallest. Let's see what adding header tags does. Delete the colon in your headline and surround the text with <H1> and <H2> tags, like this:
<BODY BGCOLOR="#FFFFFF" TEXT="#000000" LINK="#33FFFF" VLINK="#330066" ALINK="#330066">
<H1>E-Z Accounting</H1>
<H2>Tax Services That Aren't Too Taxing</H2>
</BODY>
See it in action <javascript:openWindow('ss04y.html','Win',true,600,650)>
That's better. Notice that the headers automatically break the line for you. Notice, too, that each line is automatically aligned to the left. Wouldn't these lines look better centered? Add the <CENTER> tag:
<BODY BGCOLOR="#FFFFFF" TEXT="#000000" LINK="#33FFFF" VLINK="#330066" ALINK="#330066">
<CENTER>
<H1>E-Z Accounting</H1>
<H2>Tax Services That Aren't Too Taxing</H2>
</CENTER>
</BODY>
See it in action <javascript:openWindow('ss04z.html','Win',true,600,650)>
Now we're getting somewhere.
Let's tell the viewer more. Under the </CENTER> tag, let's type in:
Are you a freelance Web designer looking for a good accountant--one who's up on all the latest changes in the tax laws? Try E-Z Accounting. You'll get top-notch service from an honest accountant who's inexpensive, knowledgeable, and--best of all--knows the Internet and the type of work you do.
Ready to save some money? Let E-Z Accounting tell you more about our services, fees, and background.
See it in action <javascript:openWindow('ss04w.html','Win',true,600,650)>
Save and view the file in your browser. (Selecting File/Open or File/Open Page in most browsers will prompt you to enter the location of your saved file.) Depending on your browser, you'll notice one of two things: either the text continues beyond the right side of the page and off into cyberspace, or it fills the entire width of the page no matter how wide or narrow you make the browser window. (The former happened more frequently in older browsers; with modern browsers the text will most likely just wrap.) Even if you type hard line returns when you enter the text, HTML doesn't recognize them. (Note that in our example, the two paragraphs have merged into one.) If you want to take back control of your text, you need a couple more tags: <BR> and <P>.
<BR> forces a line break without adding any white space after the tag. This tag is a good choice for creating line breaks inside paragraphs. Keep in mind, though, that manually broken lines often look awkward when a viewer's browser window is sized narrower than usual: the text runs across the screen, wraps to the next line, and then breaks again a few words later. For that reason, stick to using <BR> only when you need to force a line break for reasons of design or content.
The <P> tag breaks the text and inserts a blank line, which is useful for separating paragraphs from each other. By default, both the <BR> and the <P> tags start the text following the tag on the left side of the page, but the <P> tag's ALIGN attribute can change that. Use <P ALIGN=RIGHT> to align the paragraph with the right side of the page or <P ALIGN=CENTER> to center the paragraph.
Since we want our example to break into two separate paragraphs, insert a <P> tag before each text paragraph, like this:
</CENTER>
<P>
Are you a freelance Web designer looking for a good accountant--one who's up on all the latest changes in the tax laws? Try E-Z Accounting. You'll get top-notch service from an honest accountant who's inexpensive and knowledgeable, and--best of all--knows the Internet and the type of work you do.
</P>
<P>
Ready to save some money? Let E-Z Accounting tell you more about our services, fees, and background.
</P>
See it in action <javascript:openWindow('ss04v.html','Win',true,600,650)>
Not bad, but your text is still pretty plain. You can make some points jump out by using the <I> (italic) and <B> (bold) tags. You can also "nest" these tags to create bold italicized text (remember: First on, last off). You can use the <PRE> tag to preformat text and the <TT> tag to use teletype or monospaced text. You can see examples of those tags in our Formatting Flavor < /Authoring/StupidThree/ss02.html?tag=st.bl.f062700.txt.StupidThree_02> tricks. Apply these tags judiciously, of course. Too much emphatic text makes a page look annoyingly busy.

Adding Links

Now you're ready to learn about the anchor tag, which allows the Web to be the astounding collection of linked information that it is. You'll use the anchor tag and its attributes to connect text on your Web page to other Web pages, email addresses, and online addresses. Without the anchor tag, the Web wouldn't exist.
Let's put this powerful tool to work by making a few links in the line "Let E-Z Accounting tell you more about our services, fees, and background." We'll assume that the information about the company's services, fees, and background will go on separate pages, called respectively services.html, fees.html, and backgrnd.html. Whenever someone clicks one of those words, you want to send him or her to the appropriate page.
Let's add anchor tags to the second paragraph, like this:
<P>
Ready to save yourself some money? Let E-Z Accounting tell you more about our <A HREF="services.html">services</A>, <A HREF="fees.html">fees</A>, and <A HREF="backgrnd.html">background</A>.
</P>
What does this do? The <A> tag tells the browser that you're creating a link. The HREF attribute stands for Hypertext Reference--the technical name for a link. Whatever follows HREF= in quotes is the actual name or URL of the item to which you want to link. In this case, we're assuming that you're linking to pages that reside in the same Web server directory as your original index.html page. If you have multiple directories, you would just name the appropriate directory before the file name. For example, if the services.html page lived in a directory called main, you would link to it like this: <A HREF="main/services.html">.
Now when users look at this page, they'll see the words services, fees, and background as hyperlinks. Hyperlinked text will appear underlined and in a different color than standard text. Remember that you designated the color of your links in the <BODY> tag <ss03.html> earlier. (Of course, we'd actually have to create those pages for these links to work. In our example, clicking a link will just bring you back to the same window.)
See it in action <javascript:openWindow('ss05x.html','Win',true,600,650)>
The anchor tag can do more than just link Web pages to other pages on the same site. It can also link to pages at other Web sites. For instance, we could link to the IRS home page like this:
...in the <A HREF="http://www.irs.ustreas.gov/">tax laws</A>...
The anchor tag doesn't have to send visitors away from your starting page. Using the NAME attribute, you can simply jump users to another location on the same page. This technique can be particularly useful on exceptionally long pages. Suppose that the page explaining E-Z Accounting's fees has sections for both businesses and individuals. You want to create a link that takes individuals directly to their information below the business fee information.
The NAME attribute labels the destination of the link with an anchor name. In this example, we'll name it "individuals." Go to the destination text and surround it with the tags <A NAME="individuals"> and </A>. Then go to the text you want to link from and surround that text with the link tags <A HREF="#individuals"> and </A>. Now when someone clicks the link, he or she will be taken to the target text further down the page.


Creating HTML Lists

Sometimes a list is the best way to organize a lot of information. For instance, you could use a list of links as a table of contents for a particularly long FAQ <http://coverage.cnet.com/Resources/Info/Glossary/Terms/faqs.html?tag=st.bl.f062700.txt.faqs> file. HTML contains a variety of list-making tags to help you get started.
The simplest and most common is an unordered or bulleted list, denoted by a <UL> tag. This type of list places bullets before each list item, which you designate with an <LI> tag (for "list item"). If we apply this tag to the three reasons to check out more information about E-Z Accounting, the code looks like this:
Ready to save yourself some money? Let E-Z Accounting tell you more about our
<UL>
<LI><A HREF="services.html">Services</A>
<LI><A HREF="fees.html">Fees</A>
<LI><A HREF="backgrnd.html">Background</A>
</UL>
See it in action <javascript:openWindow('ss06x.html','Win',true,600,650)>
To get an ordered, or numbered, list, we'd replace the <UL> tags with <OL> tags; the <LI> tags remain the same:
Ready to save yourself some money? Let E-Z Accounting tell you more about our
<OL>
<LI><A HREF="services.html">Services</A>
<LI><A HREF="fees.html">Fees</A>
<LI><A HREF="backgrnd.html">Background</A>
</OL>
See it in action <javascript:openWindow('ss06y.html','Win',true,600,650)>
Because our example doesn't consist of a series of steps, let's change the <OL> back to <UL> to imply options rather than a sequential order.
A third type of list is the definition list, which is used primarily for glossaries. A definition list presents a term on one line and then its definition on a separate line. This type of list uses the <DL> tag and denotes list elements with <DT> (for "definition title") and <DD> (for "definition description"), like this:
<DL>
<DT>1040<br>
<DD>The basic form you have to fill out for a tax return.<br>
<DT>Schedule C<br>
<DD>The form you have to fill out to declare self-employment income.</DL>

HTML for Beginners Adding Graphics

A text-only page isn't going to catch anyone's eye. After all, the World Wide Web is all about color and pictures. Maybe you spent some bucks on a cool new logo; why not show it off on your Web page?
Adding graphics to your page first requires you to put that snazzy logo into a digital format. If you already have an electronic version, then you're already set. If not, you need to request one from the logo's designer, scan it yourself, or take your printed copy to a local copy shop and have them scan it.
But that's only the beginning. High-quality electronic images tend to be stored as TIFF <http://coverage.cnet.com/Resources/Info/Glossary/Terms/tiff.html> files, and the TIFF format doesn't work on the Web. You need to convert the image into a JPEG <http://coverage.cnet.com/Resources/Info/Glossary/Terms/jpeg.html> or a GIF <http://coverage.cnet.com/Resources/Info/Glossary/Terms/gif.html>. JPEG and GIF are the two image formats supported by today's browsers. JPEG works best for photographs, GIF for drawings and line art. You can make this conversion in most graphics editors, such as Adobe ImageStyler </Reviews/ImageStyler1/>.
Once you have your electronic image in the right format, you're ready for the image tag. <IMG> is similar to the anchor tag in that it points to a resource that's not actually on the page. In this case, <IMG> uses the SRC (source) attribute to point to the digital image. The code looks something like this: <IMG SRC="logo.gif">. When you place the image file in the same directory as your pages, this tag will find the image and display it in the browser.
We'll add the logo to our page, below the headings and above the text:
<IMG SRC="logo.gif">
See it in action <javascript:openWindow('ss07x.html','Win',true,600,650)>
Before you start peppering your pages with pictures, keep a couple of things in mind. Images, even small ones, take a long time to download compared to text. Always keep the image as small as possible, both in physical size and in file size, while still allowing it to get its message across. You can also speed up downloads by using the <IMG> tag's WIDTH and HEIGHT attributes. If, for instance, an image is 100 pixels wide by 150 pixels high, you'd use the following tag:
<IMG SRC="logo.gif" WIDTH=100 HEIGHT=150>
When a browser sees the attributes' values, it creates the correct image space automatically rather than having to scan the image first.
Finally, you'll want to place your images using the ALIGN attribute of the <IMG> tag. As with the <P> tag, the <IMG> alignment options are ALIGN=LEFT, RIGHT, or CENTER. For our example page, let's place the logo on the right side of the first paragraph:
<IMG SRC="logo.gif" ALIGN=RIGHT WIDTH=100 HEIGHT=150>
See it in action <javascript:openWindow('ss07y.html','Win',true,600,650)>
Now our example is beginning to look like a real Web page.
 
HTML for Beginners Creating an Email Link

Building an attractive, useful Web page is only part of the job. You also need to give viewers a way to contact you.
In the digital age, Web users expect to have instant and easy email contact with you. To make a link to your email address, you'll need to use the anchor tag again. You can separate your email contact with the <HR> tag, which inserts a horizontal line. We've decided to have the email contact link centered on the page. Put it below the list, like this:
<CENTER>
<HR>
<a href="mailto:comments@builder.com">Drop us a line!</a>
</CENTER>
See it in action <javascript:openWindow('ss08x.html','Win',true,600,650)>
Now, whenever someone viewing our page clicks the words "Drop us a line," that user's email program will automatically start up and open a new message to send to E-Z Accounting. To further customize your mailto link, see our Super Ninja Mailto </Authoring/MoreStupid/ss05.html> trick.
And that's it--you've built a basic Web page! Don't forget to check your work carefully in a Web browser (several browsers, if possible; get some friends to help) to make sure that all the elements are visible and look the way they should.


HTML for Beginners Basic HTML Tag Guide
 
The following are brief explanations of the basic HTML tags used in this article:
<HTML></HTML> - tells browsers the page is written in HTML; entire document goes between HTML tags
<HEAD></HEAD> - appears just below the HTML tag in every HTML document; contains information about the document but does not appear on the Web page
<TITLE></TITLE> - specifies the title of the document; the text between these tags appears in the browser's title bar but not on the Web page itself
<BODY></BODY> - contains all the text and images that will appear on the Web page, together with all the HTML elements that provide the control/formatting of the page
BODY attributes:
BGCOLOR - designates the background color, using a name or a hex value
BACKGROUND - designates an image as a page's background (wallpaper)
TEXT - designates the text color, using a name or a hex value
LINK - designates the color of links, using a name or a hex value
VLINK - designates the color of followed links, using a name or a hex value
ALINK - designates the color of links on click, using a name or a hex value
<H1><H6></H1>-</H6> - codes text as headings; <H1> is the largest, <H6> the smallest
<CENTER></CENTER> - centers text and other elements on a page
<BR> - breaks text onto a new line (no vertical space between lines)
<P></P> - breaks text into a new paragraph (leaves a blank line above the new paragraph)
<I></I> - creates italicized text
<B></B> - creates bold text
<PRE></PRE> - designates preformatted text
<TT></TT> - designates teletype or monospaced text
<HR> - inserts a horizontal rule; helpful in breaking up sections of a page
<HR SIZE=x> - designates the size (height) of a rule
<HR WIDTH=x> - designates the width of a rule, in percentage or absolute value
<HR NOSHADE> - inserts a rule without a shadow
<A></A> - marks text as the start and/or destination of a link; requires the HREF or NAME attribute
HREF - attribute of the <A> tag; makes text or image between <A> tags a hyperlink
NAME - attribute of the <A> tag; makes text or image between <A> tags the target of a hyperlink
<IMG SRC="x"> - Adds an image
<UL></UL> - creates an unordered (bulleted) list
<OL></OL> - creates an ordered (numbered) list
<LI> - used in conjunction with the <UL> or <OL> tag, designates a list item in an unordered or ordered list
<DL></DL> - creates a definition list
<DT> - used in conjunction with the <DL> tag, designates a definition title in a definition list
<DD> - used in conjunction with the <DL> tag, designates a definition description in a definition list
If you're curious about the myriad HTML tags we didn't cover, check out the HTML Compendium's comprehensive list of HTML elements <http://www.htmlcompendium.org/0frame.htm>.
The steps to getting your pages on the Web vary by Internet service provider. You'll have to contact your ISP to find out exactly what you have to do. And if your ISP doesn't give you server space on which to post Web pages, CNET can help you find another one <http://webservices.cnet.com/>.